Don’t Make Me Think: A Commonsense Approach to Web Usability author Steve Krug rightly states that, “If you want a great site, you’ve got to test it.” As a designer, you would know that the excellent execution of a bad idea can be a massive waste of time, money, and other resources. Therefore, to distinguish a good from a bad idea initially, you need to test your designs using prototypes. Prototypes are working models of your final product. They help emulate the functionality, look, and feel of the product you’re designing. By the time these high-fidelity models are introduced into the process, you would be at the stage of finalizing the details of the UX design. Prototypes naturally take longer to produce and cost more than wireframes or sketches. However, the ability to build and test prototypes at a rapid pace and in iterations lets you “envision” new products, evaluate feedback-based user engagement, and improvise without “developing the product” until you have a final version that everyone approves. This is a valuable way of making a small budget go a long way while reducing unwanted rework and collateral damage. In designer terms, this process or practice is called “Prototyping.”
Prototyping Definition
Prototyping is an experimental, iterative model of an idea – a mockup of sorts – that lets you test and retest before finding the best solution to your problem. It requires a mix of creativity and practicality, perhaps one of the essential steps to delivering good design. Add the word Rapid to Prototyping, and it becomes a process of quickly mocking up features of your website or mobile application. The term rapid implies that this process is quicker and inexpensive than a full-blown mockup of your product.
Commonly used Rapid Prototyping Techniques:
- Rapid sketched paper prototypes: These include a rough schematic design on a paper demonstrating the relationships between the various elements. These are typically used in the initial design stages to validate the fundamental, underlying concepts and test the design logic. Basic flaws in reasoning, layout, comprehension, and structure can be removed using this method.
- Lo-fi, monochromatic wireframes: When you are satisfied that the basic concepts are comprehensively covered, you can progress onto more complex prototyping models such as lo-fi monochromatic wireframes. These are digital models but very minimal, almost skeletal in detailing to avoid distractions from testing the operational structure and functionality. The absence of any actual design or content helps understand the working relationships between elements and whether they practically deliver user outcomes.
- High-fidelity, clickable mockups: This advanced phase of Prototyping requires some effort and expense before getting to the final stage. This mockup will cover most, if not all, of the features needed, though not completed to the level of detail or design of the final version. It will be an interactive and clickable model emulating the app or website. It would allow users to test the functionalities and features in a natural environment. Any issues or feedback derived from this activity can be taken as pertinent to the completed product. Thus, it is an exemplary process for accuracy and relevance checking and validation of the final model of the product.
The Process behind Rapid Prototyping
Rapid Prototyping helps visualize interfaces or UI screens and user flows while adding interactions so that potential users can test the product’s usability and functionality. Here are the first steps you should take before starting on your prototype.
- Define the problem and perform requirements planning.
- Ideate and come up with a tentative solution.
- Create your Prototype.
- Empathize with your users based on the feedback.
- Refine the problem.
And continue the process until you find the best, most relevant solution.
Requirements Planning for Rapid Prototyping
The requirements planning phase includes getting the UX Designers, developers, business analysts, managers, and other stakeholders to agree on the business requirements, constraints, and project scope. With rapid Prototyping, what and how much of the interface and process should be tried and tested are determined.
Creating a Scenario: Create stories that describe when users will be working with your app and what these users’ needs will be. This allows you to attempt to create valuable prototypes.
Iterating the UX: Start simply by creating low-fidelity prototypes. Don’t focus on the content or even the design. Instead, pay attention to usability and user flow. You do not need or want actual content or higher fidelity designs until the early prototypes have been validated. A prototype usually starts with an outline of the basic idea. It is then refined with features, functionalities, and interactions until the final prototype is handed over for development.
First, you scope the prototype. A prototype isn’t a fully functional, coded, working end product. Instead, it is made to help designers test their idea’s functionality, and further help users and developers visualize the concept before using/building it. So, ensure you answer these questions before jumping onto making your prototype:
- How much should be prototyped? Designers usually prototype core functionalities and any novel technologies/interactions they may have planned.
- Outline your user flow: Identify coherent paths your user may take.
- Plan your iterations: Start with the broad idea, and then narrow it down to selected areas.
- Choose the fidelity method and tools: It means choosing the technique and devices you want to use to help make your prototype closest to your end-product.
Fidelity refers to how closely a prototype resembles the final design. There are multiple dimensions to fidelity, and prototypes can belong anywhere on the spectrum for each of these dimensions. Fidelity methods are unique tools to make your prototype work significantly better. The types of fidelity methods are:
- Visual Fidelity: Styled interfaces, focusing on the look and feel of your concept.

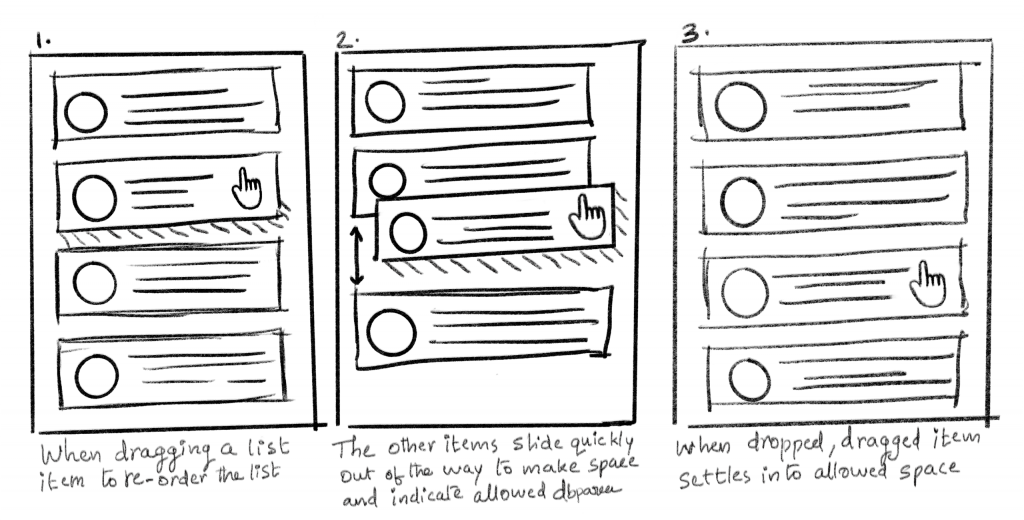
- Functional Fidelity: Interactions that focus on how your concept will work.

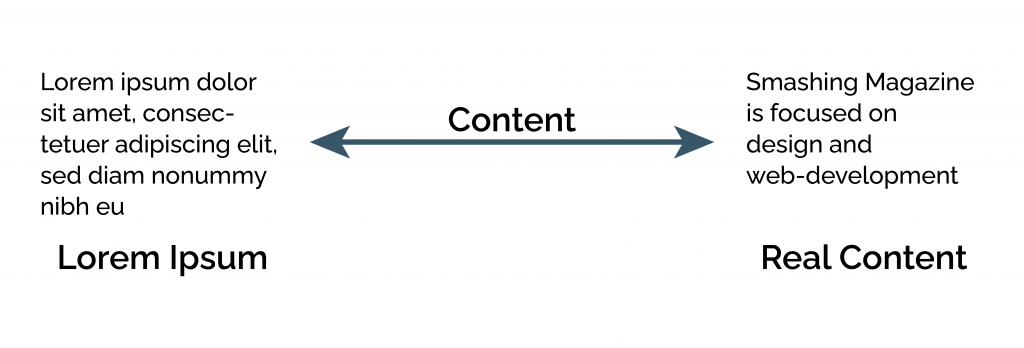
- Content Fidelity: Real content and headlines instead of dummy text.
Second, you choose the appropriate fidelity level. The spectrum of fidelity lies across.
- Low Fidelity: Sketching on paper, without using any tools or codes, and used most often in the earliest stages of the design process.
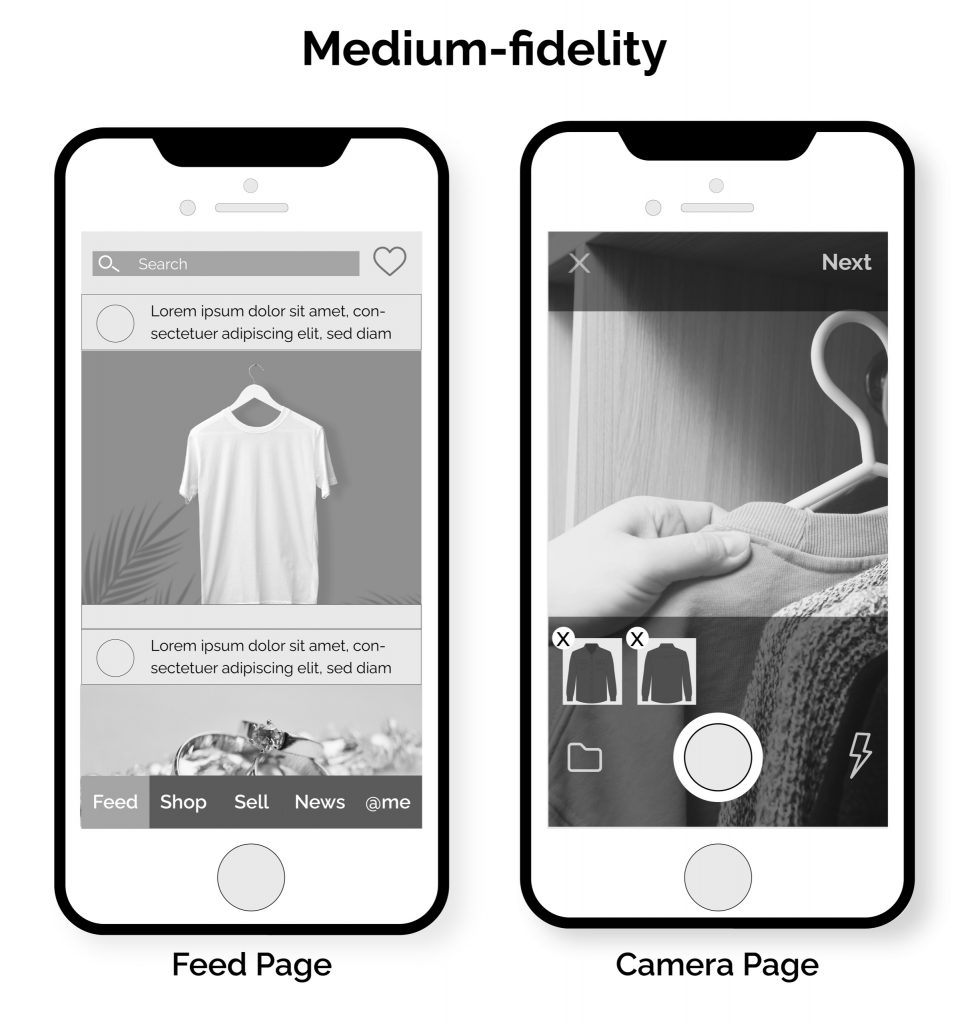
- Medium Fidelity: Using computer-based tools like Visio and Omnigraffle, creating wireframes, task flows, and user scenarios, most useful to clock user behavior and experience.
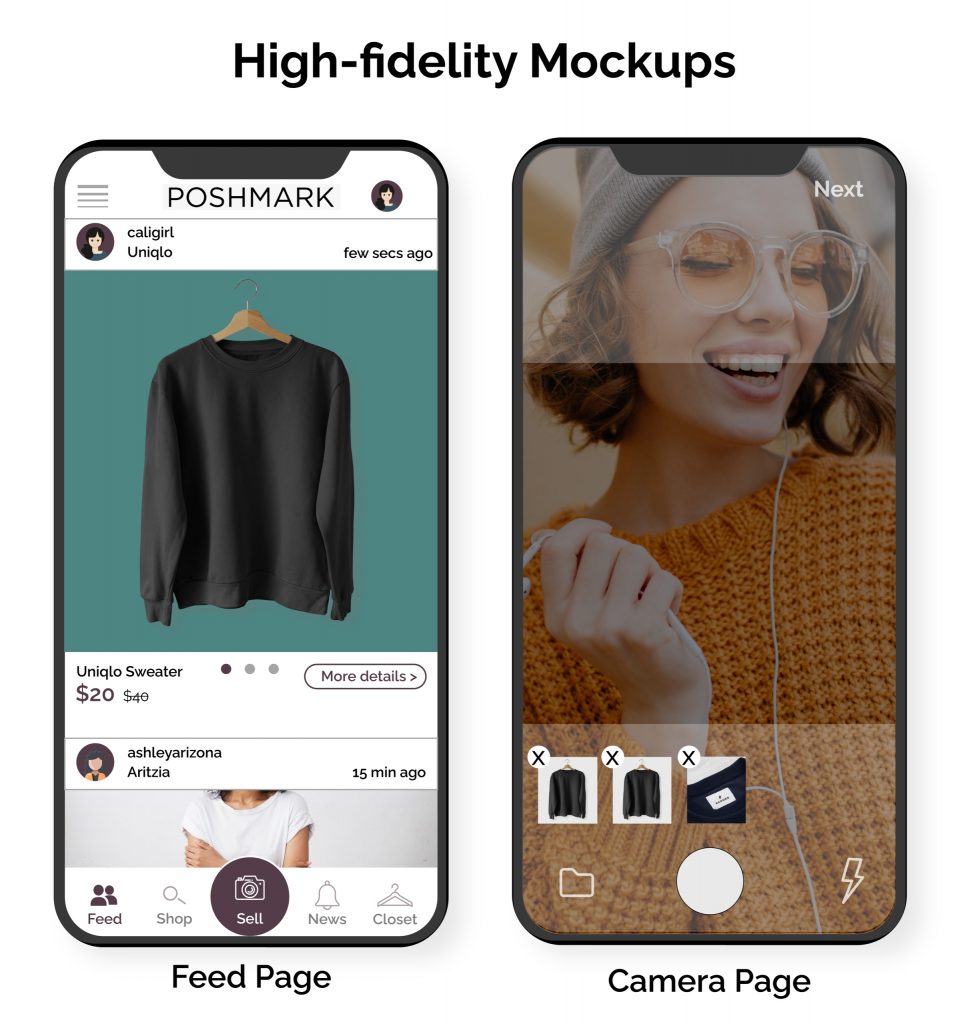
- High Fidelity: Using application-simulation tools like Axure and iRise to simulate the functionality of the final product. Most useful to produce an almost-working, refined prototype of your final product.
Expert Tip 1: Consider creating a content wireframe in the early stages of your prototyping process. Carve out spaces for broader content categories and then narrow them down to more delicate interactions. That way, you cover both the design and responsiveness of your product.
Expert Tip 2: Consider creating a content wireframe in the early stages of your prototyping process. Carve out spaces for broader content categories, and then narrow down to more nuanced interactions. That way, you cover both the design and responsiveness of your product.
When creating a Rapid Prototype: How much to build?
Prototyping an entire app’s UX is a ton of work! But, it’s not necessary to build a complete app. So, what to make?
At Radiant, we commonly prototype the following:
Core Functionality and Features: This depends on where your users spend most of their time and their most-used features. Focus on critical areas of your app and ensure they are meeting user expectations.
Novel interactions and patterns: Users are familiar with conventional structures and experiences—users knew their way around the typical design elements and how to use them. Any novel design departing from normal user expectations has to be prototyped and tested. This will iron out any kinks that could confuse users.
We recommend tackling one part or feature at a time.
Finally, choose a prototyping tool.
A gamut of prototyping tools is available in the market. However, here are the top five questions you need to ask before making a choice.
- How easy is it for you to learn the tool?
- Is the tool scalable/flexible enough for mobile AND desktop applications?
- What are the resources that come with the tool?
- Is it easy/quick to incorporate feedback and changes into the tool?
- What are the collaboration and licensing terms of the tool?
The most popular prototyping tools in 2021 include:
But here’s an important question that may arise in your mind. “Why am I doing all this? Is Prototyping that helpful?”
Yes, it is. You would understand this better with these three prototyping advantages.
- Better Communication: Design decisions are crucial to the development of an optimally functional product. With an interactive prototype at hand, it becomes much easier to understand your users’ feedback while also ensuring the whole team shares a shared understanding and goal.
- Reduced Turnaround: Hand over your prototype to your developer and see how your end product turns out. Take our word for it. Instead of writing pages after pages of documents to describe your concept and product, a rapid prototype does the job, especially in specific user flows and interactions.
- The ability to experiment, iterate and create (more confidently): Rapid Prototyping is beneficial when it comes to bouncing ideas off other designers and testing multiple approaches and solutions for your product. It enables discussions, brainstorming sessions, and great engagement, resulting in a faster and better UX design after confirming its viability. Prototyping makes way for intelligent design in no time.
What should you avoid during the rapid Prototyping of your product?
- Adding too many features: A prototype is meant to be a simple mock-up of your final product. Cramming it up with too many features and interactions will shift your focus away from the primary goal and stop you from achieving a final, good product.
- Focusing too much on aesthetics: You like pixel perfection, we know. But a prototype is meant to spark conversation and allow you to understand the nature and experience of your user. And it does just that. You want your elements to function. You want your users to ‘get it’ – so focus on that instead of trying to make it look perfect every time.
- Creating too much of everything: Make a plan, set up a KPI, and lock with your team on the prototype’s scope. Remember when we spoke about core functionalities and novel interactions? Yes. Stick to what’s essential. All. The. Time.
- Thinking you can do it on your own: Rapid Prototyping is not a solo activity. It always needs a second set of eyes. It loses its whole purpose if you’re the only one designing and reviewing, right? Sharing, interacting, dialogues! They make for a worthwhile process. You need different perspectives to create a good product, and if done right, Rapid Prototyping is an efficient way to create a product that deserves a pat on the back.
Every time you start on a new project, ask yourself, am I a better designer today than yesterday? Can I do anything better? To help you with that, we’ve curated three exercises to help improve your prototyping skills.
- The 8-6-4-2 Rapid Prototyping Method: Sketch for 8 minutes, 6 minutes, 4 minutes, and 2 minutes with quick two-minute feedback sessions in between. Task: Choose a problem and spend 30 minutes reaching out to people. Understand pain points and spend 1-2 hours sketching low-fidelity prototypes to solve those pain points.
- Solve a real-life problem you have encountered: Good design is about solving the practical pain points of your users. Sketching a prototype is a more straightforward way to achieve your daily goals for your UI design. Create one! Solving real-life problems is the foundation of good design, and nothing better than setting yourself up for a task every day.
- Collaborate with team members or people from your industry: Social media, blogs, LinkedIn Pulse are great channels to connect with like-minded people and share prototyping experiences. Set up a meeting, find a problem, and challenge each other to develop the best low-fidelity prototypes in a time-bound process. You will be surprised to see the potential you can reach.
Wrapping up
UX designers must get into the habit of practicing and creating prototypes, no matter how basic they may be, because “It’s not about what you’re building, but what happens afterward.” – Christian Abell, Vice President of Creative Projects, Marriott. Connect with Radiant’s UX design team to learn more!